- Author(s) of this documentation:
- Bertrand Kerautret
Preliminary
The GenericReader and GenericWriter class allow you to import/export different image formats depending of the optional DGtal dependancies (ITK).
Complements:
- Test the same reading/export on 3D volume (vol pgm3D format).
Basic Image manipulations
The aim of this tutorial is to propose some basic image manipulations in particular by exploiting the image adapter classes (ImageAdapter) with different functors.
Image cropping
The ImageAdapter and ConstImageAdapter can be very efficient to define for instance a cropped image (see documentation given in the moduleImages module). To persform a simple crop you can apply the following steps:
- Load the source image to be cropped.
- Define type associated to the ConstImageAdapter.
- Define a sub domain and construct the cropped image.
- Export the result.
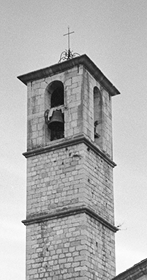
If you use image of DGtal/examples/samples/church.pgm with the given domain, you should obtain the following image:
Complements:
- Add options to define the input/output files and region bounds.
- Apply the same cropping to 3D images.
2D slice image extraction from 3D volume
In the same spirit than previous example, you can also extract a 2D slice image from a 3D volume image.
To apply the extraction you can follow these steps:
- Construct a ConstImageAdapter with the following types:
- type of the source Image (Image3D).
- the domain type of the resulting image (Image2D::Domain).
- the functor taking in input 2D data and return 3D points ( DGtal::functors::Projector<Z3i::Space>) to access to source image data.
- the type of value of the 3D image (Image3D::Value)
- the functor type to be applied on the source image value during the reading process. Image3D::Value, functors::Identity > SliceImageAdapter;Aim: implements a const image adapter with a given domain (i.e. a subdomain) and 2 functors : g for d...Definition ConstImageAdapter.h:106Aim: Define a simple default functor that just returns its argument.Definition BasicFunctors.h:288
- Construct the domain of the resulting image.
- Construct the functor to embed the 2D point into the 3D volume (by using the Projector class returning 3D points from 2D coordinates).
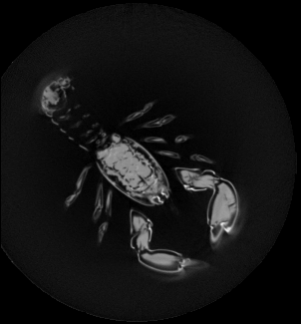
If you have used the vol file: DGtal/examples/samples/lobster.vol and a slice number, you should obtain the following image:
Hints:
- To construct the domain of the resulting image you can use a projector: DGtal::Z2i::Domain domain2D(proj(image3d.domain().lowerBound()),proj(image3d.domain().upperBound()));Aim: Functor that maps a point P of dimension i to a point Q of dimension j. The member myDims is an ...Definition BasicPointFunctors.h:107
2D Image extraction from 3D volume
The functor Point2DEmbedderIn3D defined in the BasicPointFunctors class allows to embed a point of an 2D domain into a 3D one. By this way you can extract a 2D image from a 3D volume just by using this functor as pointFunctor in the ConstImageAdapter.
To construct a Point2DEmbedderIn3D you have to give the domain of the 3d image, the origin point with an upper point on axis1 and on axis2.
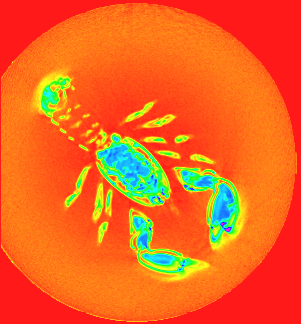
Create image with color Functor
By using the HueShadeColorMap as functor in the exportPPM method (of PPMWriter), transform a grayscale image into color. For instance with the previous image you should obtain: